Pea and poached egg soup
Gluten free, dairy free, nut free, vegetarian
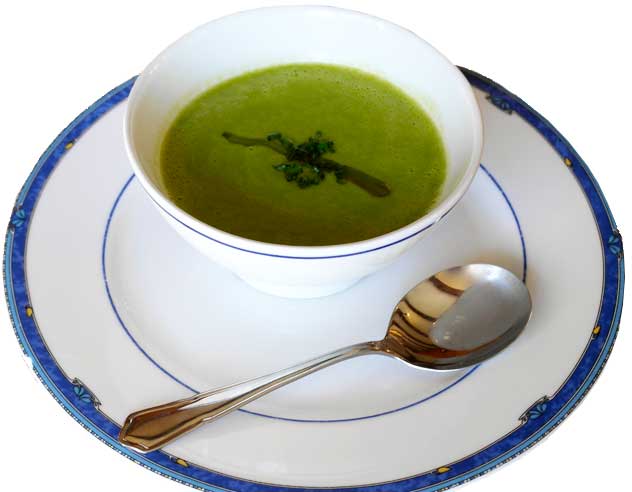
This is a brilliant starter as it is incredibly simple but utterly delicious - both the peas and the eggs speak for themselves but also bring out the best in each other.
Serves 8
800g frozen petit pois
1200 ml water
Salt and pepper
8 free-range eggs
Snipped chives
Olive oil
Salt and pepper
- Poach the eggs for 2-2.5 minutes depending on their size then immediately place in a bowl of ice water until the soup is ready, then place one egg in the bottom of each of 8 small soup bowls.
- Bring the water to the boil and add the peas; cook them until they are just tender.
- Blitz them in the blender until the soup is completely smooth – may take up to 10 minutes. Then pass the soup through a fine metal sieve back into a saucepan to remove any remaining husks.
- Re-heat the soup until not quite boiling; add more water if it is too thick and then season well with salt and pepper.
- Pour on top of the eggs into the bowls; drizzle with olive oil and sprinkle with the chives. Serve immediately.
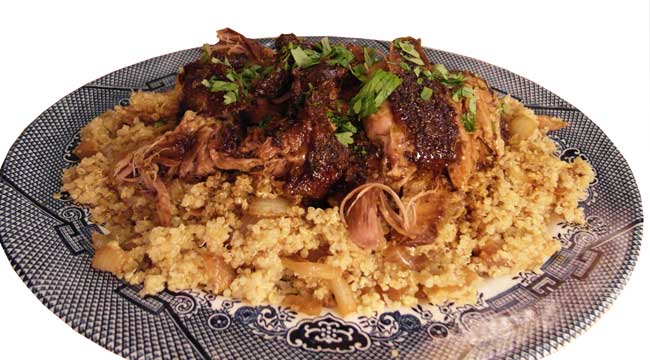
10 hour roast shoulder of lamb with caramalised onion quinoa
Gluten free, dairy free, nut free
Serves 8
For the lamb:
1 shoulder of lamb (about 2.5kg)
1 tablespoon cumin seed
1 tablespoon coriander seed
1 tablespoon hot paprika
½ tablespoon Maldon salt
Lots of pepper
Olive oil
- Pre-heat the oven to 100 degrees
- Toast the cumin and coriander seed in a heavy bottomed frying pan for a few minutes and then grind to a medium fine texture in a pestle and mortar or spice grinder and then mix in the paprika.
- Drizzle the lamb with olive oil, rub the spice mix all over it and season well with salt and pepper. Transfer to a roasting pan, add a glass of water and cover tightly with foil.
- Place in the oven and roast for eight hours, basting every few hours and add a little water if it seems dry. Then remove the foil for the last two hours, basting every 30 minutes. The meat should be perfectly tender and falling off the bone.
- Keep the roasting pan and drain away the clear fat but keep the meat juices. Place over a low heat until bubbling and de-glaze with about 100ml water.
For the quinoa:
250g quinoa, rinsed well
4 large onions thinly sliced
3 tablespoons olive oil
600 ml water
Salt and pepper
- Heat 2 tablespoons of the oil in a large frying pan, add the onions and cook over a low heat, stirring often until they are soft and golden – it will take around 30 minutes. Add a little water if the onions look a little dry, season with salt and pepper and put to one side.
- Heat the remaining oil in a large saucepan, add the quinoa and cook for 3-4 minutes, stirring, until golden, Add the water plus a large pinch of salt and bring to the boil. Cover the pan and cook over a low heat until all the water has been absorbed and the quinoa is tender (about 12-15 minutes). Fluff the quinoa with a fork to release the steam and stir in the onions. Season with salt and pepper.
To serve: place the quinoa on a large dish and arrange the lamb on top then pour over the de-glazed meat juices so that it soaks into the quinoa.
Coconut and red berry crème brulée
Gluten free, dairy free, nut free, vegetarian
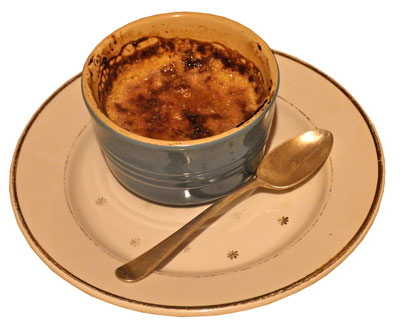 This is adapted from Ina Garten's classic crème brulee recipe in Barefoot in Paris and you can't really taste that it is made with coconut milk rather than cream. I added in the red berries as they are perfect to balance the richness of the custard. My dairy free-guests are always thrilled that they don't have to miss out on such an indulgent dessert. This is adapted from Ina Garten's classic crème brulee recipe in Barefoot in Paris and you can't really taste that it is made with coconut milk rather than cream. I added in the red berries as they are perfect to balance the richness of the custard. My dairy free-guests are always thrilled that they don't have to miss out on such an indulgent dessert.
Serves 8
For the custard:
1 large egg
4 large egg-yolks
60ml maple syrup
750ml whole coconut milk
1 vanilla pod
Caster sugar for topping
For the red berry compote:
300g mixed red berries such raspberries, red currants and cranberries (frozen work just fine)
2 tablespoons water
75g caster sugar
1. Preheat the oven to 325 degrees.
2. Place the berries in a saucepan with the water and sugar. Bring to the boil and simmer for 10 minutes. Leave to cool then pour into eight ramekins and place in the freezer until the custard is ready.
3. Put the coconut milk into a heavy bottomed pan, split the vanilla pod in half and scrape the seeds out with a knife and add to the pan. Heat it on a low/medium heat but do not let it boil.
4. Whisk together the egg, egg yolks and maple syrup. Slowly pour in the coconut milk whisking constantly.
5. Pour the custard into the ramekins trying not to mix it too much with the compote – a little swirl effect is nice but you don't want it completely blended. Place ramekins in a baking pan and pour enough boiling water in the pan to reach halfway up the sides of the ramekins. Cook for 25-30 minutes until the custard sets. Be careful not to over bake - it should be soft in the center. Cool in the refrigerator to firm up (at least 4 hours).
6. Before serving, evenly spread 1 tablespoon of sugar on top of each custard and caramelise with kitchen blow-torch.
Lemon Drizzle cake
Gluten free, dairy free, nut free
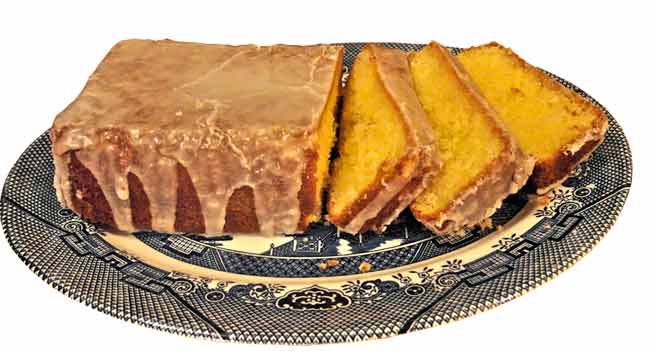
The yoghurt cake is a chalet classic that is relied upon by all seasonnaire chefs because it can be re-invented in so many variations. My favourite version is this one and I was thrilled to find out that it worked just as well when made gluten and dairy free – my guests can never tell the difference!
1 x 125g pot of soy yogurt
3 yogurt pots of gluten-free plain flour
2.5 tsp baking powder
1 yogurt pot of Vegetable Oil
2 yogurt pots of Caster Sugar
3 eggs
Grated zest of 2 lemons
Drizzle
Juice 11⁄2 lemons
85g caster sugar
- Heat oven to 180C/fan 160C/gas 4.
- Oil a loaf tin
- Using the yoghurt pot as your measure put all ingredients into a bowl and mix well. Pour the mixture into the loaf tin.
- Bake until a cocktail stick comes out clean (25 mins approx)
-
While the cake is cooling in its tin, mix together the juice of 1 1/2 lemons and 85g caster sugar to make the drizzle. Prick the warm cake all over with a skewer or fork, then pour over the drizzle - the juice will sink in and the sugar will form a lovely, crisp topping. Leave in the tin until completely cool, then remove and serve. Will keep in an airtight container for 3-4 days, or freeze for up to 1 month.
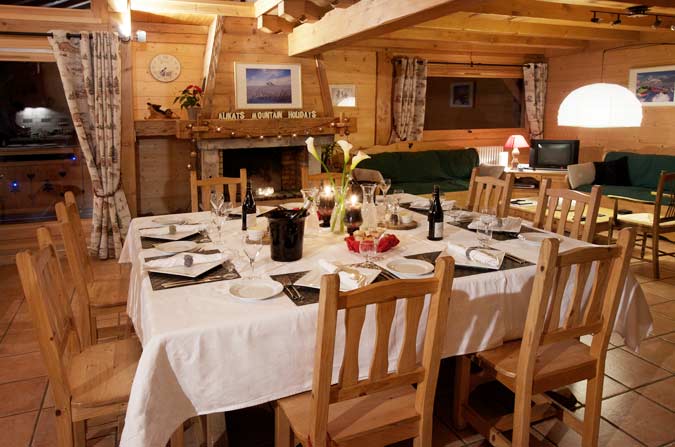 Dining at the Alikats chalet Dining at the Alikats chalet
Click here for more guest recipes
|



 This is adapted from Ina Garten's classic crème brulee recipe in Barefoot in Paris and you can't really taste that it is made with coconut milk rather than cream. I added in the red berries as they are perfect to balance the richness of the custard. My dairy free-guests are always thrilled that they don't have to miss out on such an indulgent dessert.
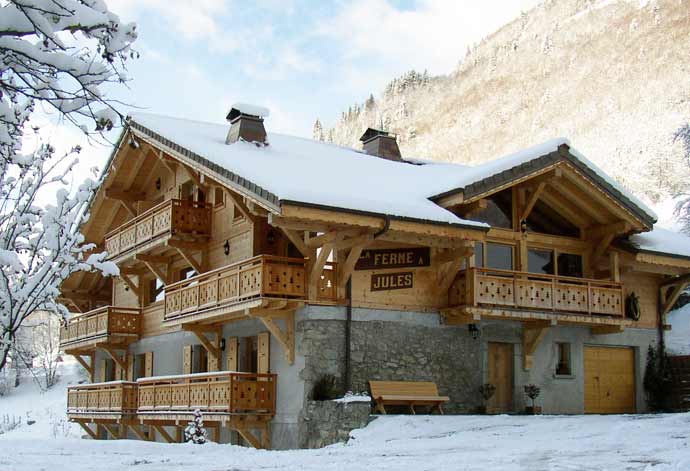
 Dining at the Alikats chalet


